Pleated Shade Installation

Installation
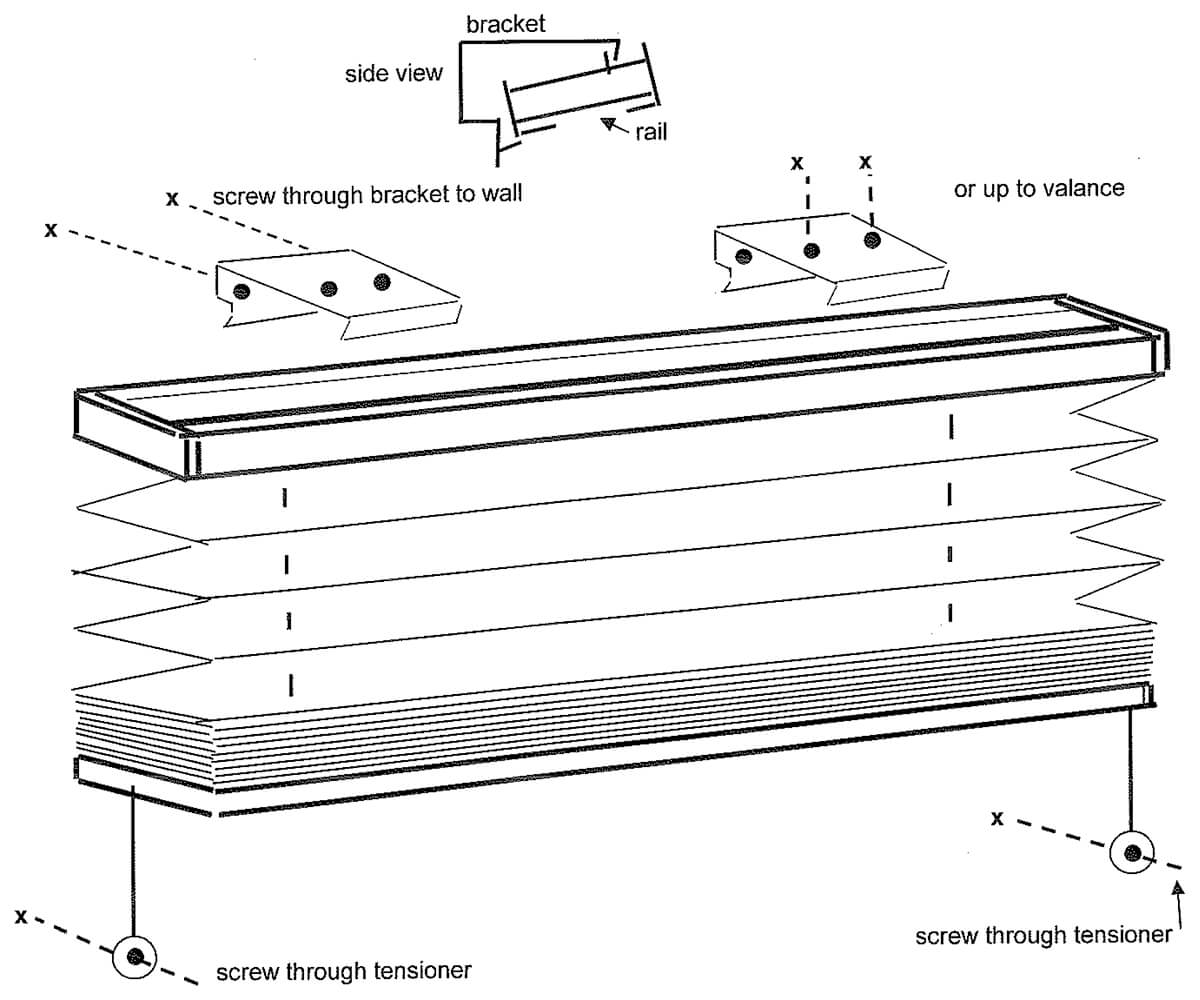
- Install mounting bracket either to the wall above the window frame or up to the bottom inside of the valance. Mount brackets approximately 4" in from the end of the shade. on shades wider than 40" install one bracket in the center also.
- Install head rail into mounting brackets by tilting front of the head rail UP. Slide hook of mounting bracket into grove of the head rail. Then push back edge of head rail up until it snaps into bracket.
- Mount tensioner by inserting a screw through the hole in the flat side and securing in place. Position tensioner directly below the end of the bottom rail with enough tension t keep the shade in the up position. Too much tension will cause the shade to work hard and the cords to wear prematurely.
With the clear spool tensioner the cord can be tightened by wrapping the cord around the spool. Both tensioners must be at equal distance from the top rail. DO NOT over tighten screws in cord tensioners or they may split.
Proper Shade Mounting
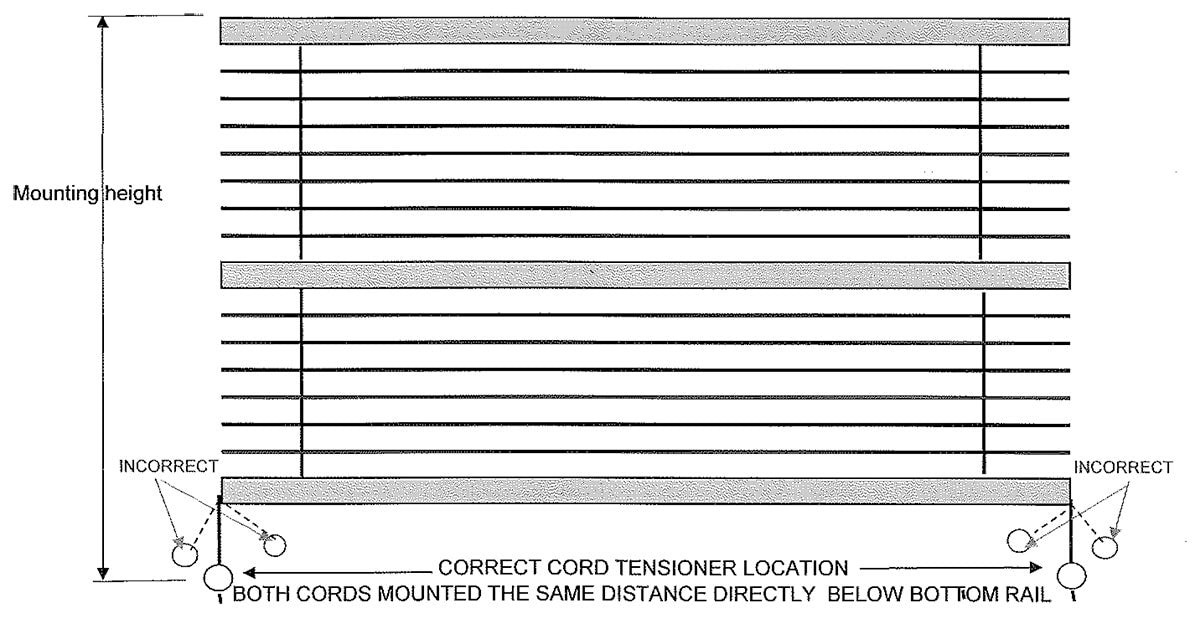
Mount cord tensioners measuring from the top of the head rail to the height the shade was custom built for.
MOUNT CORD TENSIONERS DIRECTLY BELOW END OF BOTTOM RAIL (This assures proper tension throughout the total operation of the shade)

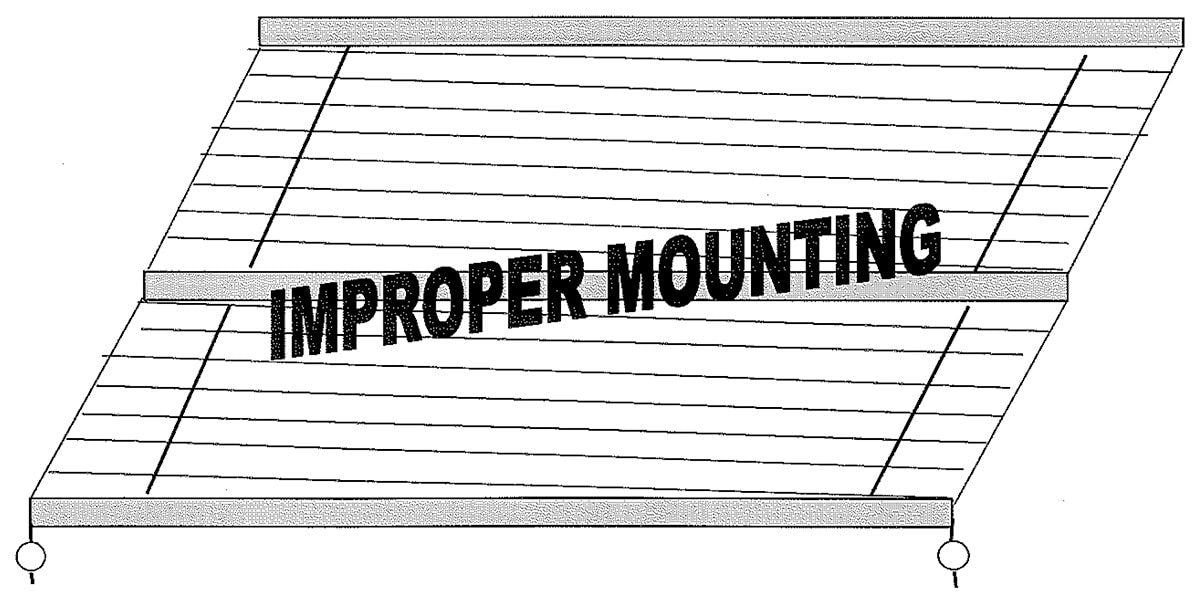
MOUNT BOTTOM RAIL DIRECTLY BELOW TOP RAIL
(This keeps pleats from running at an angle)


